Overview
Views
Calendar, list, and time frames
Filtering
Focus on specific content
Campaigns
See campaign date ranges
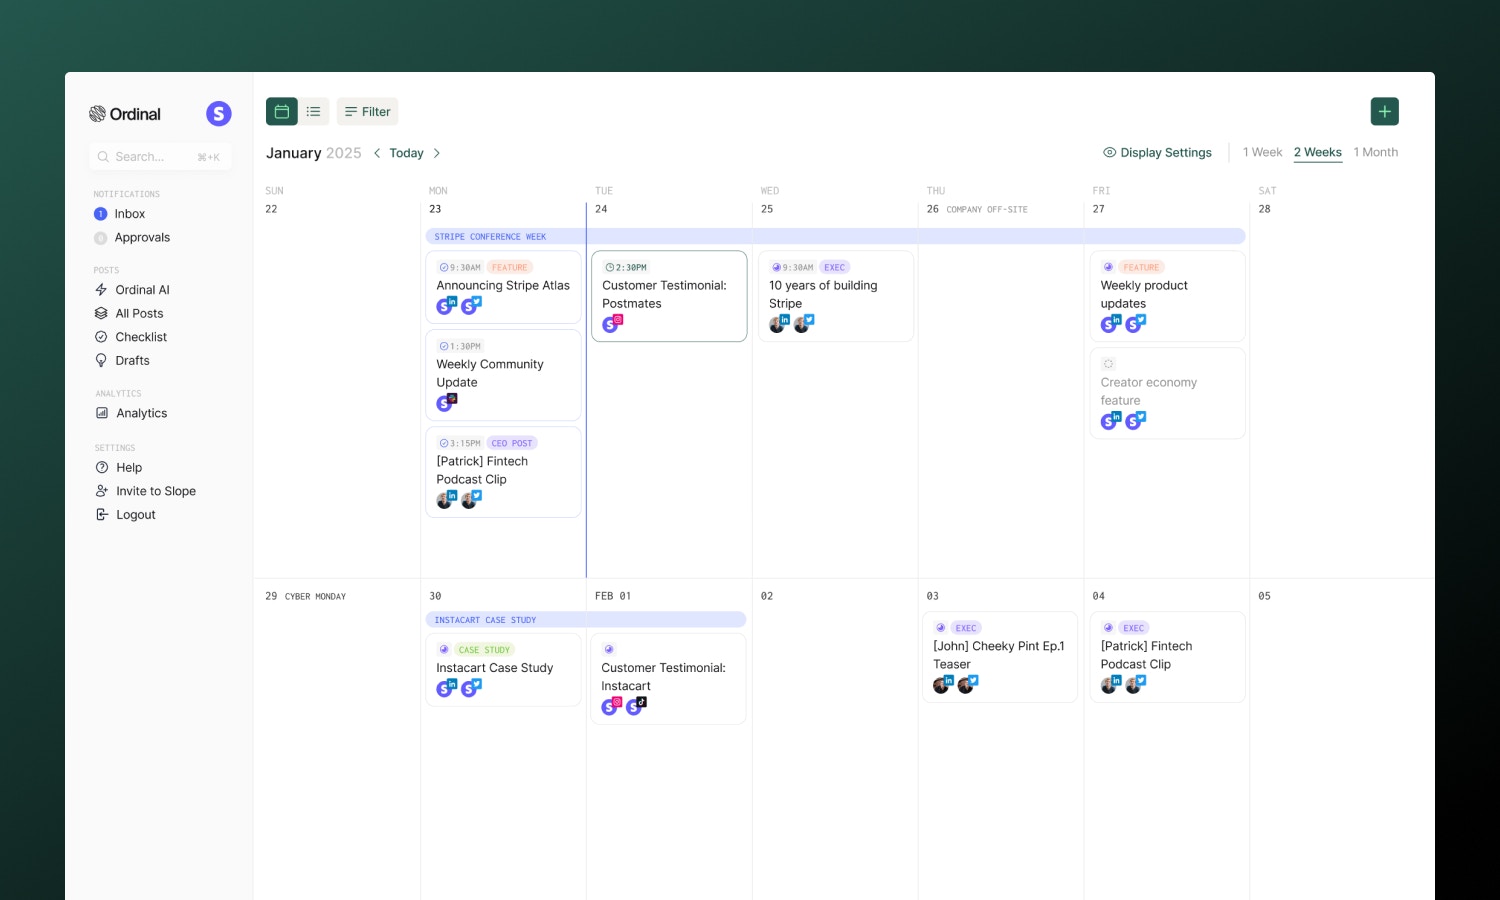
Views
Toggle between Calendar and List using the icons in the top-left corner:- Calendar
- List
The default visual grid showing posts by date:
- Posts appear as cards on their scheduled day
- Platform icons show which channels each post targets
- Color-coded by status
- Drag posts to reschedule them
- Click any day to create a new post for that date
- US holidays are labeled on their respective days
W), 2 Weeks (X), or 1 Month (M). The 2-week view is the default.Creating Posts
Click anywhere on the calendar to create a post for that date. The new post modal opens with the date pre-filled. Just choose the channel you want to post to and click Create Post.Rescheduling
Drag and drop posts directly to new dates:- In calendar view, drag posts between days
- If the post is already scheduled, we’ll automatically reschedule it for the same time on the new day. You’ll see a confirmation toast appears when the post is successfully rescheduled.
Published posts cannot be rescheduled - they’ve already gone live.
Filtering
Focus on specific content using the filter dropdown:| Filter | Use case |
|---|---|
| Channel | Show only LinkedIn, Twitter, etc. |
| Status | Show only scheduled, posted, or failed |
| Label | Focus on specific content categories |
| Campaign | See only posts in a campaign |
| Account | Show posts for specific profiles |
Saved Views
Save frequently-used filter combinations as named views that appear in your sidebar for quick access:- Apply your filters (channel, status, label, etc.)
- Click Save in the filter bar
- Name your view (e.g., “LinkedIn Only” or “Scheduled This Week”)
Campaigns on Calendar
Campaigns help you organize larger launches, multi-day events, or themed content series. On the calendar, campaigns appear as colored bars spanning their date range - making it easy to see when campaigns start and end at a glance.- Each campaign shows as a distinct colored band across its dates
- Click a campaign bar to open the campaign details
Campaigns
Learn more about creating and managing campaigns.
Navigation
| Action | Method |
|---|---|
| Previous period | Click ← or press ← key |
| Next period | Click → or press → key |
| Jump to today | Click Today or press T |
| 1 week view | Press W |
| 2 weeks view | Press X |
| 1 month view | Press M |
| New campaign | Press C |
Settings
Timezone
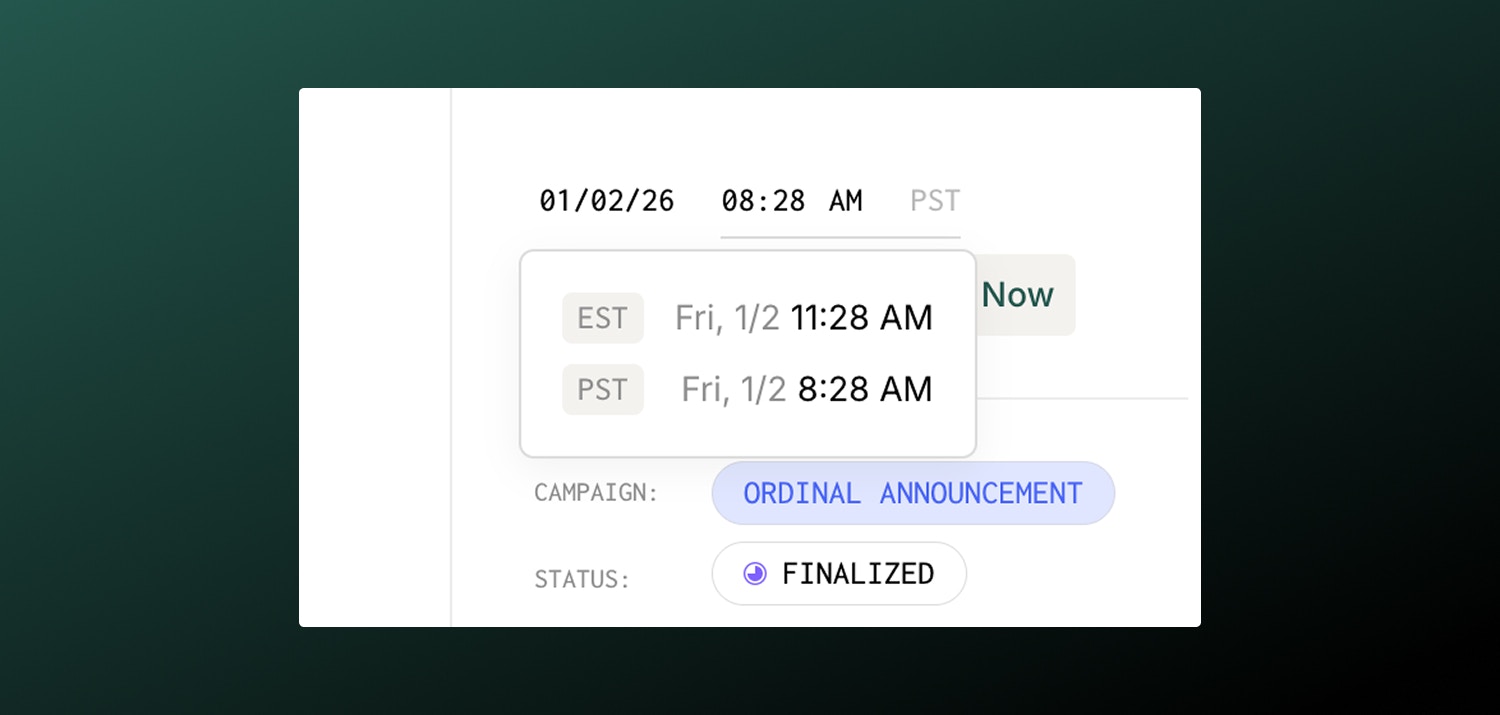
Please note that even though your workspace timezone will allow you to easily see the conversion from your local timezone to the workspace timezone app-wide, the calendar and default times will still be based on your computer’s local timezone.
Start of Week
Choose whether your calendar week starts on Sunday or Monday. Set this in your user preferences under Settings → Preferences.Learn more
Scheduling Posts
Set publish times for your content.
Campaigns
Group related posts together.